ROADHOG
Completed: 09/2021
Letter to the Clients:
Welcome!
You fucked up and handed me, Victor Khaze, something intended for use by children, told me you’d cover the expenses, and left me COMPLETELY unsupervised with only the vaguest of goals. Well, here we are. And here IT IS: Your brand new ROADHOG.
Yes, it must be capitalized. Yes, every time.
What started its life as a $300 off-brand PowerWheels Jeep found its way into your home, was placed recklessly into my care by you KNOWING FULL WELL THE KIND OF PERSON I AM, and has become what could only be described as a terrifying monstrosity of pint-sized proportions.
But let’s not point fingers. After all, what you do with this beast from now on is COMPLETELY out of my hands.
For now.
ANYWAYS.
Hope you like it.
What Happened Here?
How did we get from child's ride-on toy to a fully customized, fully loaded machine designed for adult levels of tomfoolery and mayhem?
My friends Dustin and Jen Breiter know that I have an affinity for tinkering. So, when they found an abandoned powerwheels-type toy on the curb, they brought it to me.
"We're going to be going to Wasteland Weekend and we'd like to enter this into a race at the event."
"What do you need done to it?"
"We're going to be going to Wasteland Weekend and we'd like to enter this into a race at the event."
"What do you need done to it?"
"We need you to see if you can make it run and try to get it as close to 10 MPH as you can. And if it's possible, make it remote controllable."
"How long do I have?"
"About a month."
"Hm... Yeah. I can do that."
I loaded it into my car and thus began one of the biggest builds I've ever done, making use of all of my maker skills: programming, electronics, metalworking, woodworking, 3d design, 3d printing, and even painting.
THE SPECS
Original
Model # BTD-0905WHT
(1) 12v 7Ah Battery, 12v System
Factory Control Unit (Damaged)
Loose Steering System Intended for Children
Mp3 Player (Damaged)
Headlights/Taillights
2 Speeds (Max 12v)
Shitty Steering Wheel for Small Baby Hands
Seatbelt
Pull Handle
Rollbars
Side Mirrors
Max Speed: 4MPH
Wall Charger (12V, 1 AMP)
ROADHOG
Model # FW-626
(2) 12v 9Ah Batteries, 24v System
Secondary 12v 10 Amp Power System
(2) Marine Grade Waterproof Cigarette Lighter Sockets
Tertiary 5v 5 Amp System
Under-hood USB Port with QuickCharge
Custom Control Unit
Arduino NANO Atmega328p Microcontroller
32KB Flash Memory
16mhz Clock Speed
JenMobile Firmware 1.2
(2) BTS960 43A Motor Driver
Power Dashboard
Reinforced And Stiffened Steering System Intended for ADULTS
Custom Wooden Steering Wheel
Headlights/Taillights
3 Speeds (Max 24v)
No Seatbelt
No Pull Handle (IT WILL PULL YOU)
No Side Mirrors
Bitchin’ Leather Net on Rollbars
TIRE SPIKES
Max Speed: 8 MPH
Wall Charger (24V, 2 AMP)
Solar Backpack
Solar Charge Controller (24V, 20A)
(2) USB Ports
Solar Panel (24V, 30 Watt)

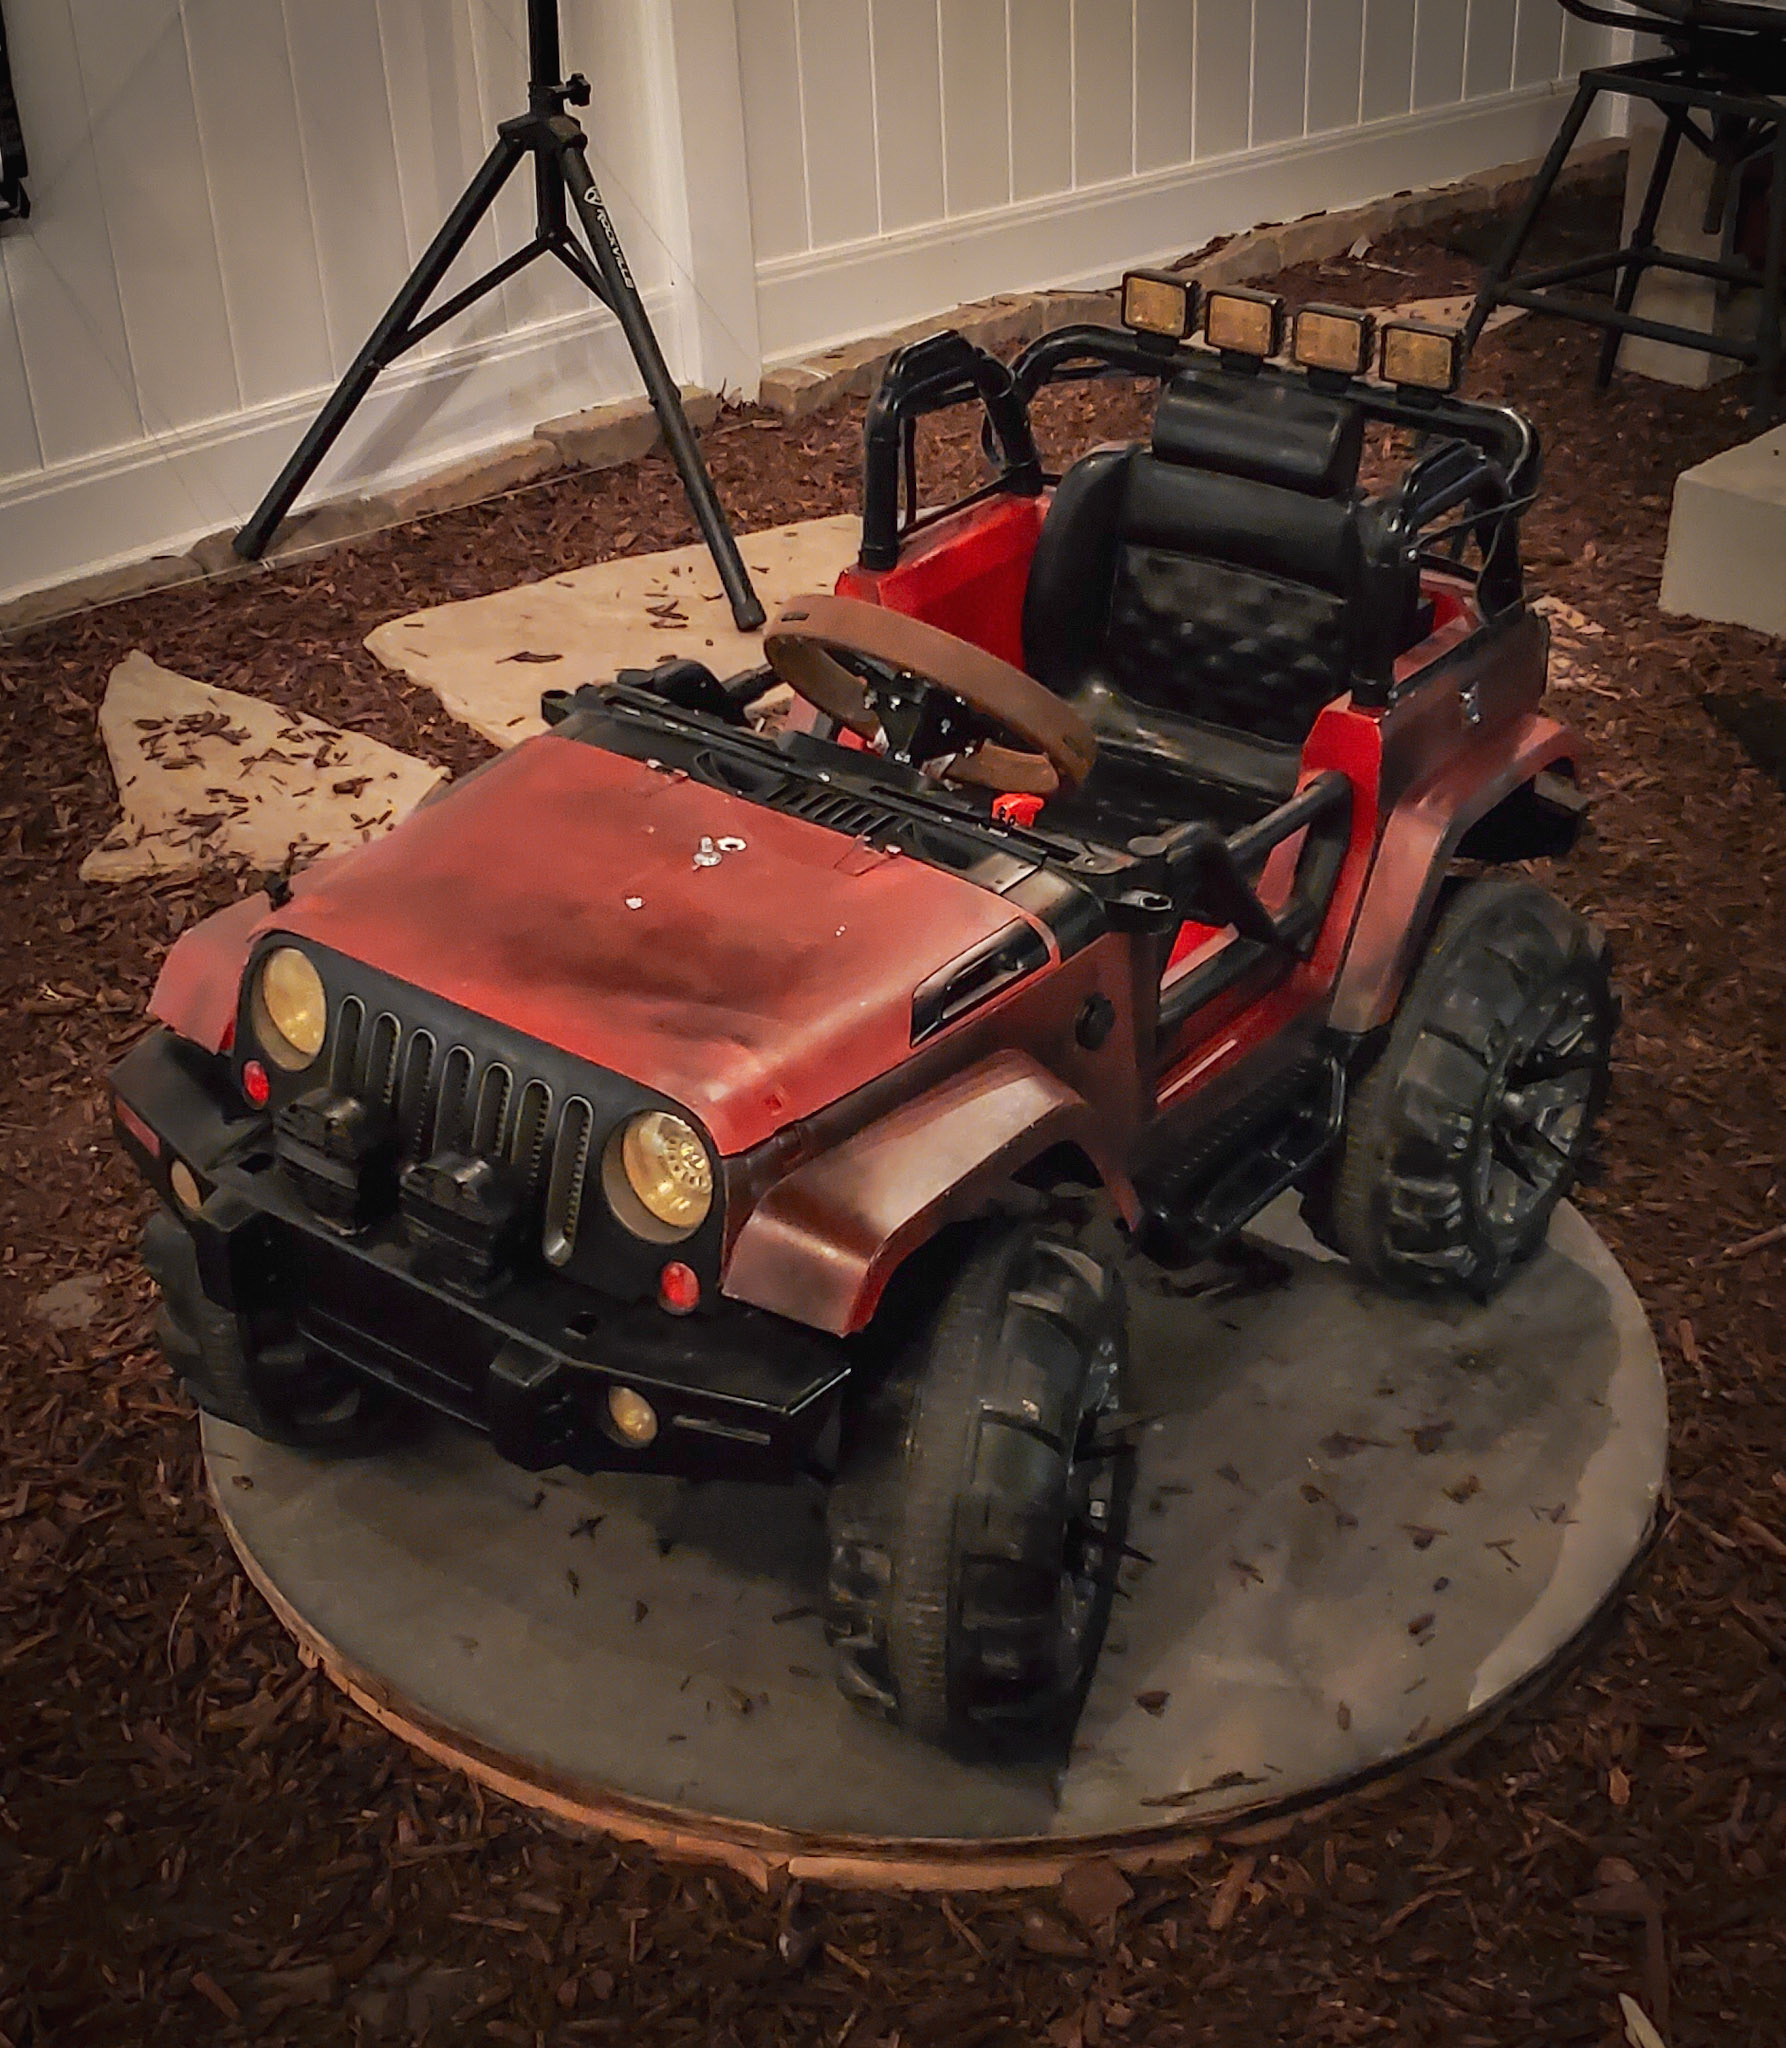
ROADHOG with Raspberry Pi Zero Mounted to the Hood.
THE PROCESS
This project was an exercise in, believe it or not, restraint.
"Perfect is the enemy of Done" was the mantra during all of the planning and build phases and, rather than trying to make the most ambitious project EVER and letting that cloud my focus, my actual goal for this project was producing a minimum viable product. I.E., what is the least I can do for this project to accomplish its goal?
Based on that philosophy, I set out with a barebones plan:
1. Determine what on the car works and what doesn't.
2. Determine what on the car that doesn't work can be fixed and what needs to be tossed.
3. If it can't be fixed and it's necessary to get the car moving, find, buy, or fabricate a replacement. If it's an aesthetic feature and it doesn't work, toss it.
4. Figure out what needs to be modified to increase the speed.
With this plan in hand, I started my diagnostic.
What worked: Both drive motors, the steering motor, LED lights, throttle pedal
What worked: Both drive motors, the steering motor, LED lights, throttle pedal
What did not work: The battery, charging port, mp3 player, and control box
This meant that, while there was nothing wrong with the components that actually did physical things on the car, everything that controlled them or powered them was dead on arrival and had to be replaced.
Having worked on similar (albeit smaller scale) projects, I quickly put together a shopping list of the major components I'd need. I also took the time to check in with my friends.

With the order approved, but no word on paint, I decided to take the initiative and begin the makeover.
My initial instinct was to just give it a coat of white and a clearcoat on top of that to basically resurface the body and bring it back to Factory Fresh.
But that would not be appropriate.
But that would not be appropriate.
See, Wasteland Weekend is event with a particular aesthetic. Centered around the post-apocalyptic world of MAD MAX, anything looking anywhere remotely Factory Fresh would stick out like a sore thumb. In fact, the dirtier and more disused something looks, the better. So, I opted for something different.
Before anything, though, the car needed a good cleaning. Everything got soaked and brushed with soap and water, then again with vinegar and water as a mild degreaser. Finally, everything got a water rinse and was left to fully dry before proceeding.
Pulling them aside, I took all the black plastic pieces and resurfaced them with a blowtorch. Now, you might question the rationale in applying an open flame to plastic, but this is a common method used in body shops to de-age black plastic trim on cars. It lightly melts all of the scratches and restores the surface: bringing matte parts back to matte and giving a glossy sheen to smooth parts.


Next, I took the white plastic body of the car and gave the underside a double coat of black lacquer spray paint. Everywhere else on the body and hood got a five-step painting process:
1. Gloss Cardinal Red undercoat
2. Several light and uneven coats of Farmhouse Black and Forged Hammered Antique Pewter
3. Another very light coat of red
4. A scuffing pass on high-wear areas with #0 steel wool and a scotch brite pad for artificial weathering
4. More light coats of black and pewter, including some applied to a cloth and rubbed on
5. Finally, once everything was dry, a rubbed-on coat of 10w-30 motor oil.

Electronics
With the painting done and the body reassembled, it was time to get the electronics set up. With more than 18 different components to connect, across three different power rails, connecting everything was something of an electrical sudoku. I made an electrical diagram, but I know very well that those are not as useful as I wish they were. Especially when it comes to how they reflect physical layouts. So, what I kept with me while getting the wiring together was a hierarchical list.


- Batteries
- Charging Port
- Master Switch – Power Dashboard - Fuse
- 24v->12v Converter
- Cigarette Power Sockets
- LED Lights
- 24v->5v Converter
- Control Board
- Dashboard Switches
- Throttle Pedal
- Motor Controllers
- Transistor
- LED Lights
- Micro USB Cable
- Motor Controllers
- Motors
Hiccups
Invariably on a project like this not everything will go as planned. This is the part of the story where I tell you where things went wrong, got confused, or generally didn't follow the path of least resistance.
The Steering Wheel:
One of the earliest hiccups I hit in this project was in dealing with the steering wheel. This ride on toy was designed so that the steering wheel, once installed onto the steering column, would securely and safely stay on so that any pint-sized pilot would be unable to remove it. Unfortunately, grown ass adults will find it near impossible to remove as well. Undo as many screws as you want; it won't make a difference. The mechanism that keeps the steering wheel on is inaccessible once installed.
The solution I found to remove it was... it was fun. Not pragmatic. Not simple. Just fun.
I blowtorched it until it was soft, blowtorched a knife until it was hot, and hacked it off of the metal steering column bit by messy bit. SO much fun.
But now I needed a steering wheel for the car. So, I made one. I went with a multi-part hub design and a two-part wooden wheel.
Unfortunately, when screwing together all of the pieces into the rim, the wood cracked, so that arm of the wheel had to be reinforced with rope. Aesthetically, this ended up working rather well!


The Remote Control:
This part was heartbreaking.
This car has a motor BUILT IN specifically for remote controlling the steering. I tested it several times during the build. IT WORKED.
I went and built a remote for the car, wrote all the code for the remote and the car so that they would work together seamlessly. Struggled for A WEEK with getting the wireless communication working properly. Managed to get it finally working ON THE DAY THE CAR WAS SUPPOSED TO BE DELIVERED.
And then I go, plug the remote control hardware in, update the code on both devices and...
I don't know when. I don't know how. But at some point a gear inside the steering motor broke and, when I pushed a button on the remote the motor just free spun.
And then I go, plug the remote control hardware in, update the code on both devices and...
I don't know when. I don't know how. But at some point a gear inside the steering motor broke and, when I pushed a button on the remote the motor just free spun.
I was shattered. Speechless. Stunned beyond emotion.
And there was nothing I could do to fix it.
So, I just set aside the remote, commented all of the relevant code out on the car's side, and delivered the car.
I'm STILL upset.

The Camera:
The loss of the remote control functionality also took out another feature which WAS finished: a wifi streamable remote camera. Attached to the hood of the car was a Raspberry Pi Zero W with a RPi Camera module in a strong, sturdy 3d printed case that made it look like a glowing red cyborg eye crossed with an air intake scoop. You'll see it in many of the photos above.
Well, without a remote control there wasn't much point of a remote camera. As a result, I pulled that off too, but left a standard 1/4" bolt so that they could mount a go pro to the hood if they wanted it.
Closing Notes
The car was delivered. Were my clients happy? Yeah. You could say that.